

Your garden is more than just a place where plants grow — it is an outdoor canvas waiting to be filled with personality, creativity, and color. DIY yard art transforms ordinary outdoor spaces into vibrant, eye-catching landscapes that reflect your unique style. Whether you have a sprawling backyard or a compact patio, handmade garden art adds charm that store-bought décor simply cannot replicate. From colorful garden sculptures and mosaic stepping stones to whimsical wind spinners and repurposed metal art, there are endless ways to breathe new life into your yard. Best of all, most of these projects are budget-friendly and beginner-accessible. This guide explores 14 stunning DIY yard art ideas that will help you add bold color, texture, and artistic flair to every corner of your outdoor space.
Mosaic Garden Stepping Stones
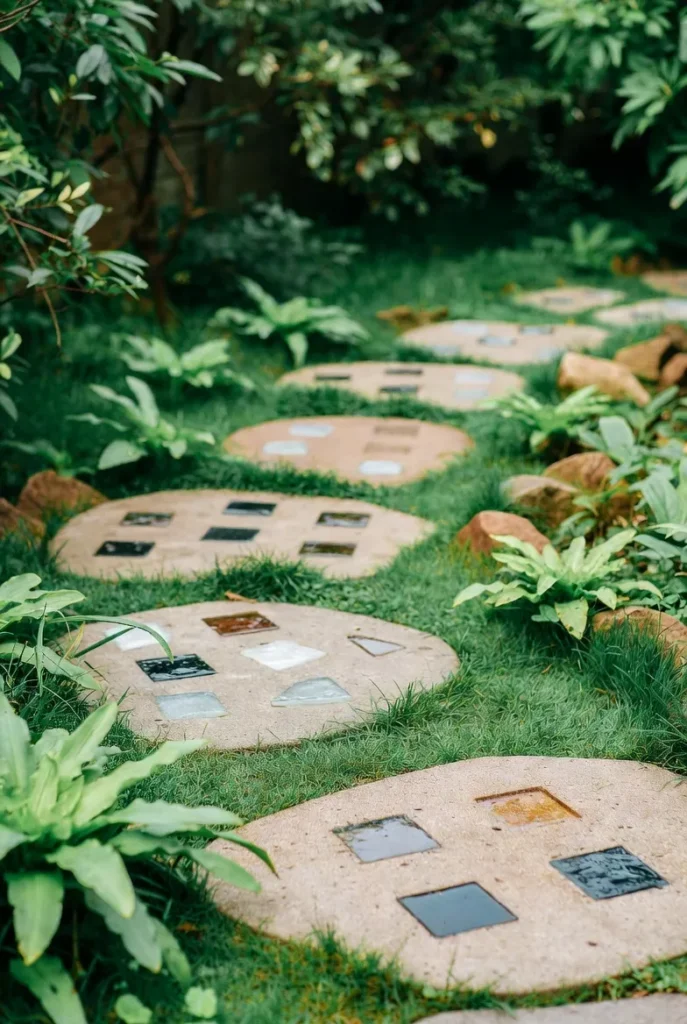
One of the most beloved forms of DIY garden art is the mosaic stepping stone. These functional works of art serve a dual purpose — guiding foot traffic while adding a burst of color to garden paths and lawns. To make your own, you will need a concrete stepping stone mold, quick-set concrete mix, and broken tiles, glass pieces, or decorative pebbles.
Start by mixing your concrete and pouring it into the mold. While it is still wet and workable, press your chosen mosaic pieces into the surface in any pattern you like — geometric shapes, floral motifs, or even abstract designs all look stunning. Use a combination of vibrant blues, greens, yellows, and reds to create maximum visual impact. Once the concrete sets and cures fully, remove the stone from the mold and seal it with an outdoor sealant to protect the colors and extend its lifespan.
Mosaic stepping stones are one of the most searched DIY garden projects for good reason. They are highly customizable, relatively low-cost, and make wonderful personalized gifts. Line a garden pathway with a series of matching stones, or scatter mismatched designs throughout your flower beds for a collected, eclectic look. Children especially love helping with this project, making it a perfect family weekend activity.
Painted Rock Garden Borders
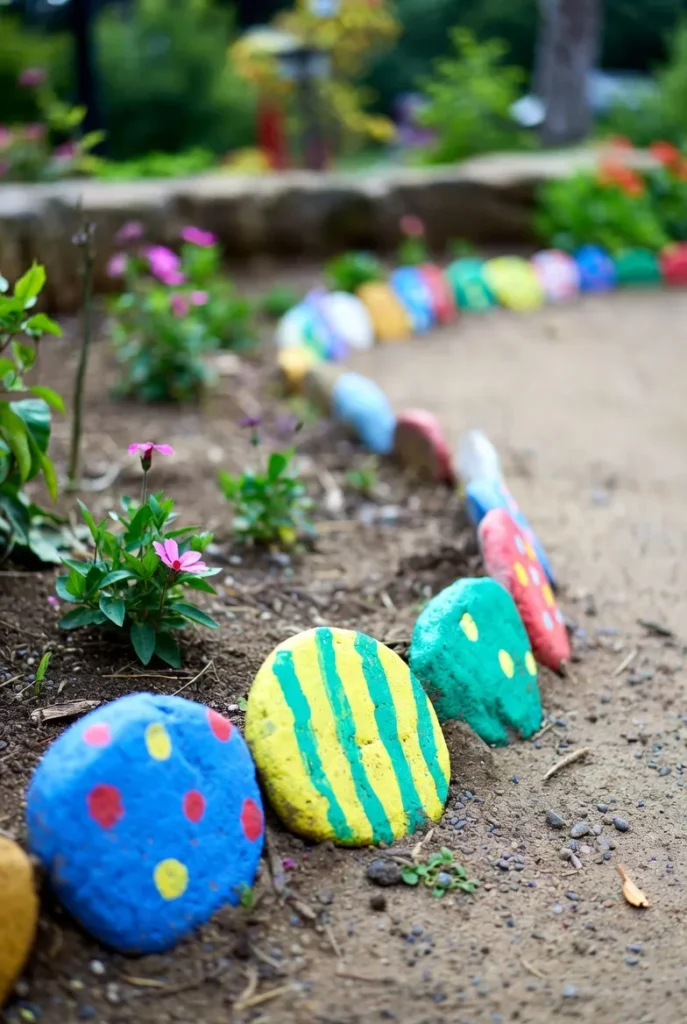
Painted rocks have taken the gardening world by storm, and for good reason. This simple, low-cost project requires nothing more than smooth rocks, outdoor acrylic paint, and a clear sealant. Use rocks to line flower beds, define garden borders, or create decorative focal points around trees and shrubs.
For maximum color impact, paint rocks in bright, contrasting hues. Popular designs include ladybugs, sunflowers, geometric patterns, inspirational words, and animal faces. You can also paint rocks to mimic fruits and vegetables for a playful kitchen garden look. Sealing finished rocks with a waterproof outdoor varnish ensures they maintain their vibrant colors through rain and sun.
Large painted rocks can also serve as natural garden markers, labeled with the names of herbs, vegetables, or flower varieties. This makes them both decorative and functional — a winning combination in any garden design. Group clusters of themed painted rocks together to create a mini rock garden feature, or scatter individual pieces throughout your yard for delightful surprise discoveries.
Upcycled Tire Planters
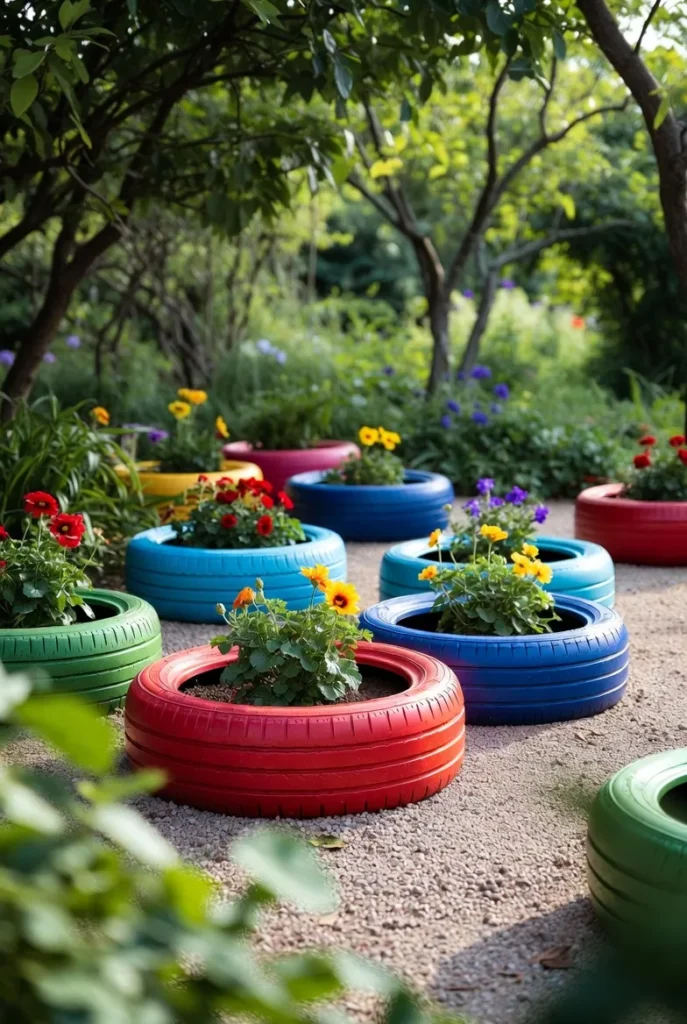
Old tires are one of the most versatile materials for DIY garden art. Instead of sending them to a landfill, transform them into bold, colorful planters that add a playful, rustic touch to any outdoor space. A single tire can be painted in any color and filled with potting soil to grow trailing flowers, succulents, or herbs.
For a more dramatic display, stack multiple tires in graduating sizes to create a tiered planter tower. Paint each tire a different color for a rainbow effect that draws the eye immediately. Bright shades of orange, turquoise, yellow, and coral work particularly well against lush green foliage.
You can also cut and shape tires into decorative swan or flower planters — a technique that has been popular in cottage gardens for decades. Use a sharp utility knife to scallop the top edge of a tire into petal shapes, then turn it inside out to form a flower bowl. Paint it in your chosen color, fill with soil, and plant your favorite trailing flowers inside. The result is a unique, eye-catching garden sculpture that costs almost nothing to make.
Wind Spinners and Kinetic Garden Art
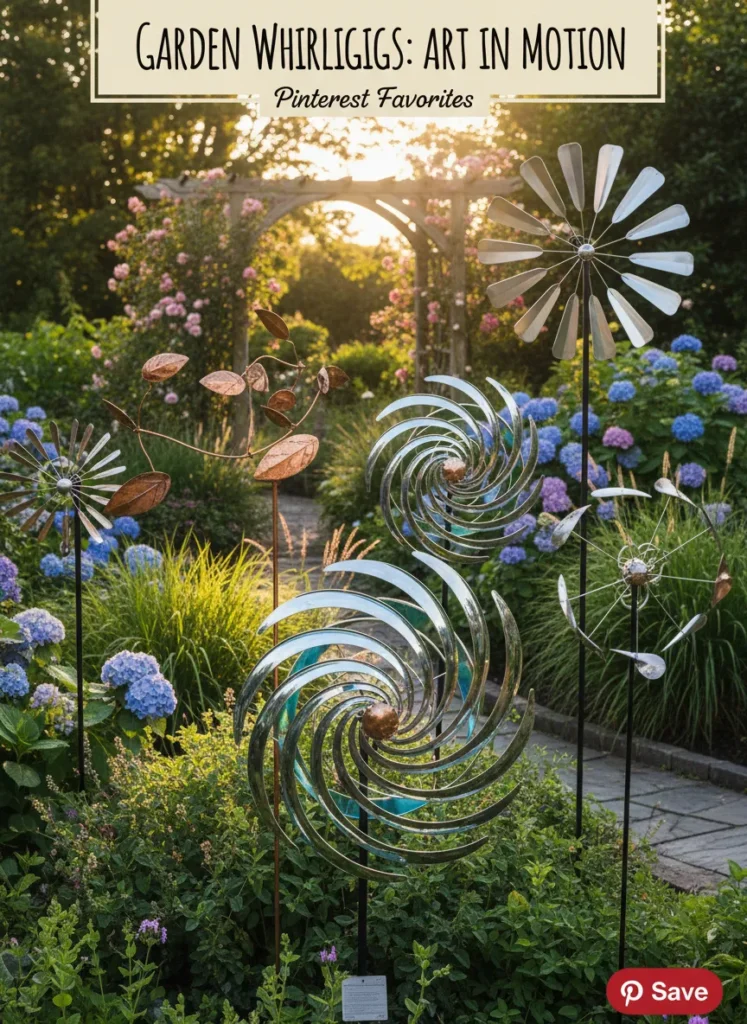
There is something magical about kinetic yard art — the way it moves with the wind brings life and energy to a garden in a way that static sculptures simply cannot. DIY wind spinners are surprisingly easy to make and require only basic materials like aluminum cans, copper wire, wooden dowels, or even old CDs.
To make a classic aluminum can wind spinner, cut a clean, empty can into spiraling strips that fan outward when the top is secured and the bottom hangs freely. Paint the strips in metallic or iridescent colors so they catch the light beautifully as they spin. Hang a series of these from a shepherd’s hook or garden arbor for a dazzling display.
For a more elaborate project, create a copper pipe wind chime and spinner hybrid that produces both movement and sound. Cut copper pipe into varying lengths, sand and polish them to a warm golden sheen, and hang them from a central pivot point using fishing line. As the wind moves through your garden, the pipes will spin, sway, and produce a gentle, musical tone. This kind of DIY garden sculpture becomes a true sensory experience.
Colorful Bottle Trees
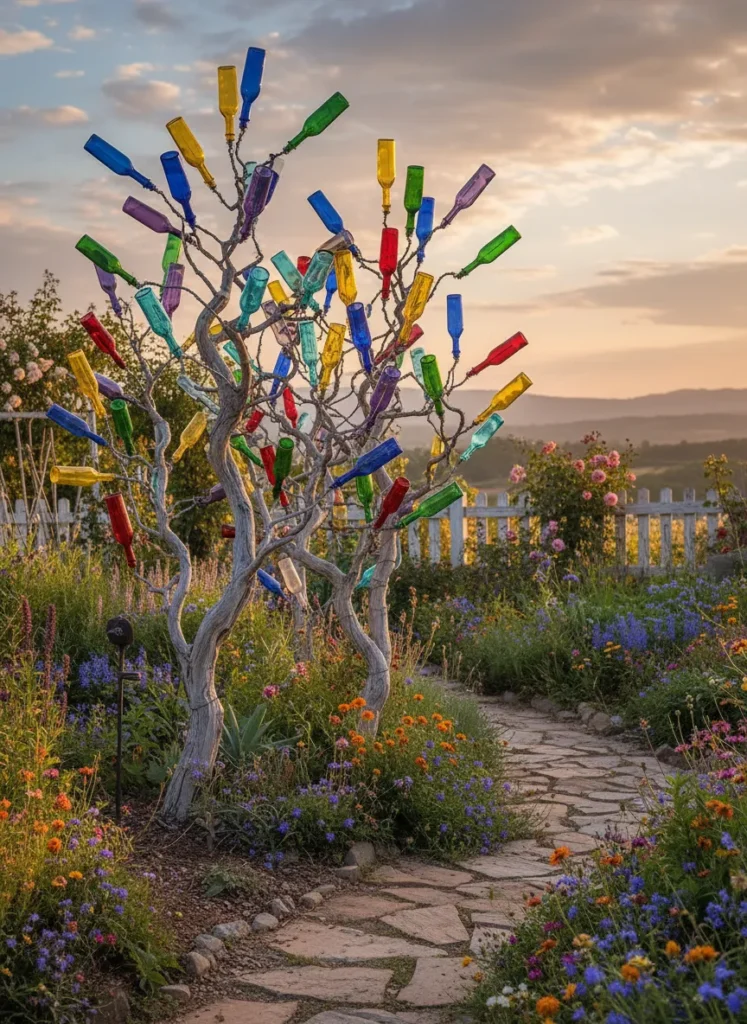
The bottle tree is a beloved Southern garden tradition with roots stretching back centuries, and it remains one of the most visually striking forms of yard art you can make at home. The concept is simple: insert colored glass bottles over the upturned branches of a metal or wooden tree frame. Sunlight filters through the glass, casting jewel-toned shadows across your garden in mesmerizing patterns.
You can purchase pre-made bottle tree frames or fashion your own from rebar, copper pipe, or a real tree trunk with branches trimmed to stubs. For the bottles, cobalt blue, emerald green, amber, and purple glass creates the most dramatic color display. Collect bottles over time from recycling, thrift stores, and yard sales.
Position your DIY bottle tree where it will receive direct afternoon sunlight for the full glowing effect. Clusters of bottle trees in varying heights create a stunning garden focal point. Some gardeners thread string lights inside the bottles for a magical nighttime display that transforms the garden after dark.
Reclaimed Wood Garden Signs and Art
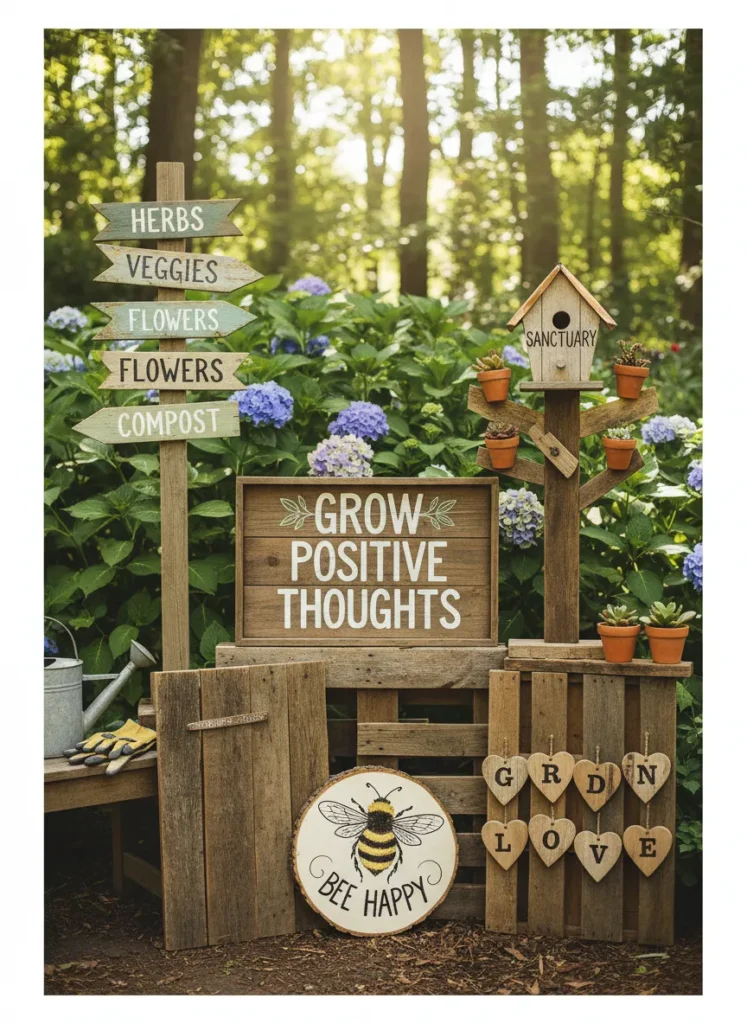
Weathered, reclaimed wood has a natural warmth and texture that looks beautiful in any garden setting. DIY wood garden art can range from simple painted signs to elaborate carved panels and fence murals. Visit salvage yards, lumber outlets, or check online marketplaces for old barn wood, pallet boards, and fence pickets.
For painted wood signs, sand the surface lightly, apply a base coat of outdoor paint, and add your design with stencils or freehand brushwork. Floral motifs, wildlife scenes, inspirational quotes, and garden-themed typography all work beautifully on weathered wood. Finish with a coat of exterior polyurethane to protect against the elements.
For a larger installation, create a reclaimed wood garden mural by arranging mismatched boards in a patchwork pattern and painting a cohesive image across the entire surface — a sunset landscape, a field of wildflowers, or a whimsical garden scene. Mount it on a fence or garden wall for a statement piece that completely transforms the space. The natural variation in the wood grain adds texture and depth that canvas simply cannot replicate.
Gazing Balls and Reflective Garden Spheres
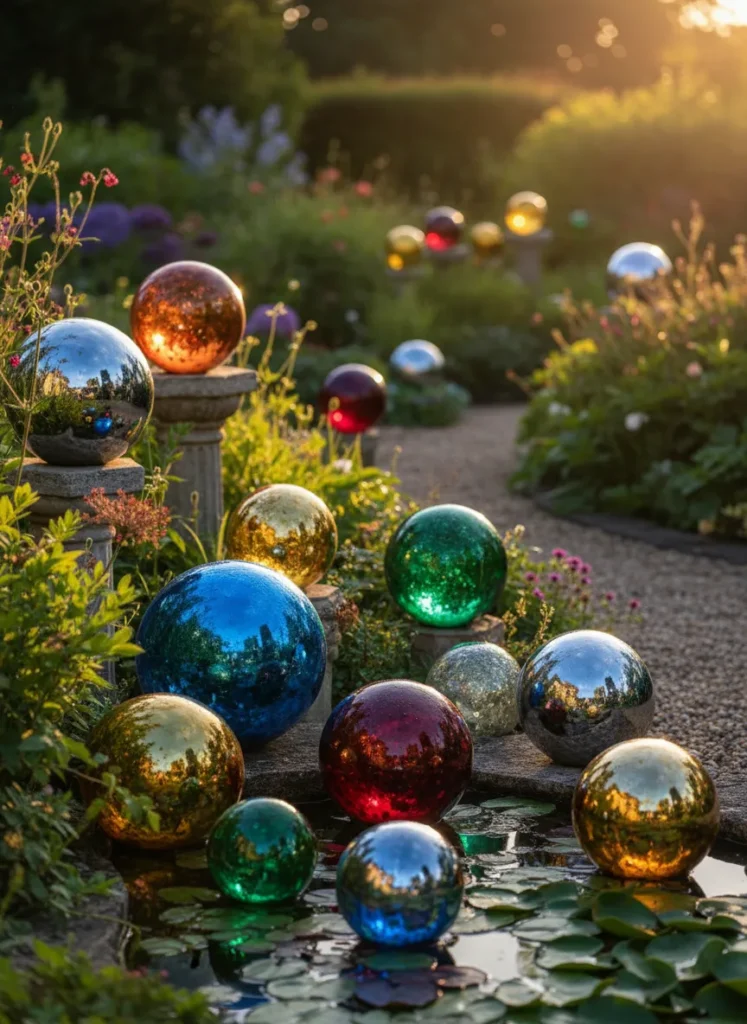
Gazing balls have been a garden staple for centuries, and the DIY versions are every bit as beautiful as expensive store-bought alternatives. Classic gazing balls are made from glass or metal and placed on pedestals to reflect the surrounding garden in a dreamy, distorted way.
To make your own, start with a plain bowling ball from a thrift store or yard sale. Clean and sand the surface lightly, then apply a base coat of metallic spray paint. For a mirrored effect, use mirror mosaic tiles applied with outdoor adhesive — the result is a stunning, multi-faceted reflective sphere that rivals professional versions. For a more colorful option, cover the bowling ball in vibrantly painted geometric shapes or floral designs using outdoor acrylic paint.
You can also create gazing ball pedestals from stacked terracotta pots, concrete blocks, or carved wood to elevate your sphere and give it proper garden presence. Group several gazing balls of different sizes and colors together for a sculptural installation. Placed among flower beds or along garden paths, they catch light beautifully and add a sense of depth and magic to the landscape.
Metal Garden Sculptures from Scrap
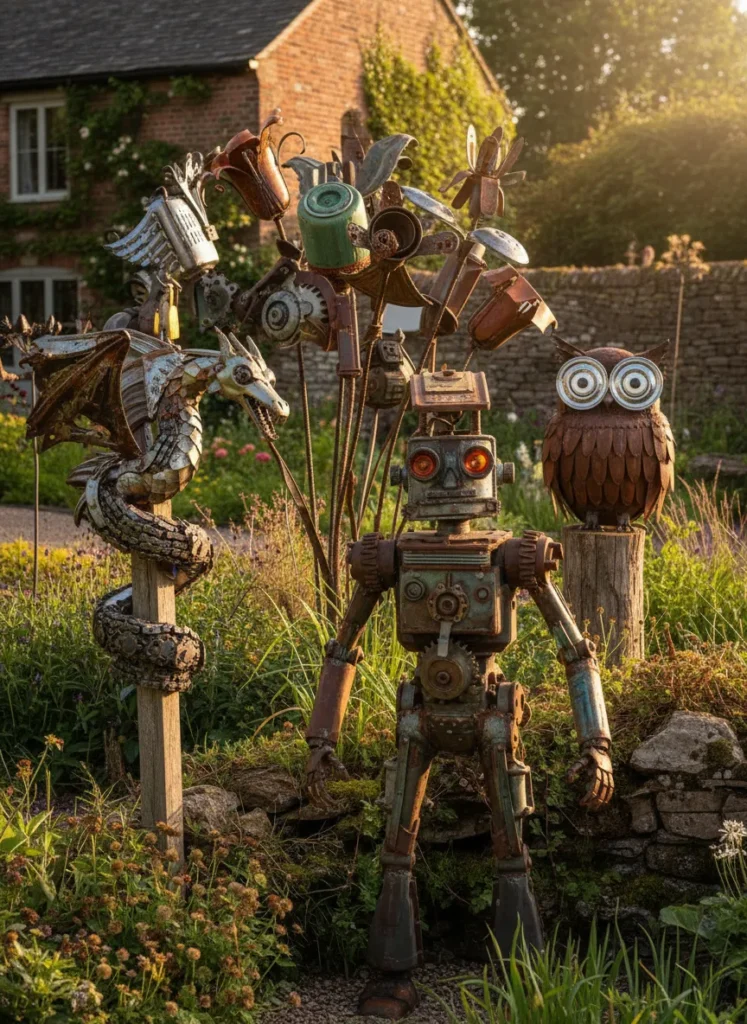
Scrap metal garden art has a bold, industrial aesthetic that contrasts beautifully with soft garden greenery. Old tools, machine parts, nails, bolts, wire, and sheet metal can all be welded, bent, or wired together to create striking garden sculptures. Even without welding skills, you can create impressive metal art using strong outdoor adhesive or wire binding.
Popular scrap metal garden sculptures include oversized flowers with gear centers and petal-shaped blades, abstract figures made from repurposed tools, dragonflies crafted from old spoons and forks, and sun faces assembled from assorted metal pieces. Finish metal sculptures with a coat of rust-resistant outdoor paint in bold colors, or leave them to develop a natural patina for a more organic, aged look.
Tall metal garden totems are particularly effective — stack metal pieces vertically on a central rod driven into the ground to create a colorful, textural tower that acts as a garden focal point. These work especially well at the back of deep flower borders where height is needed to add visual interest above the planting.
Fairy Garden Installations
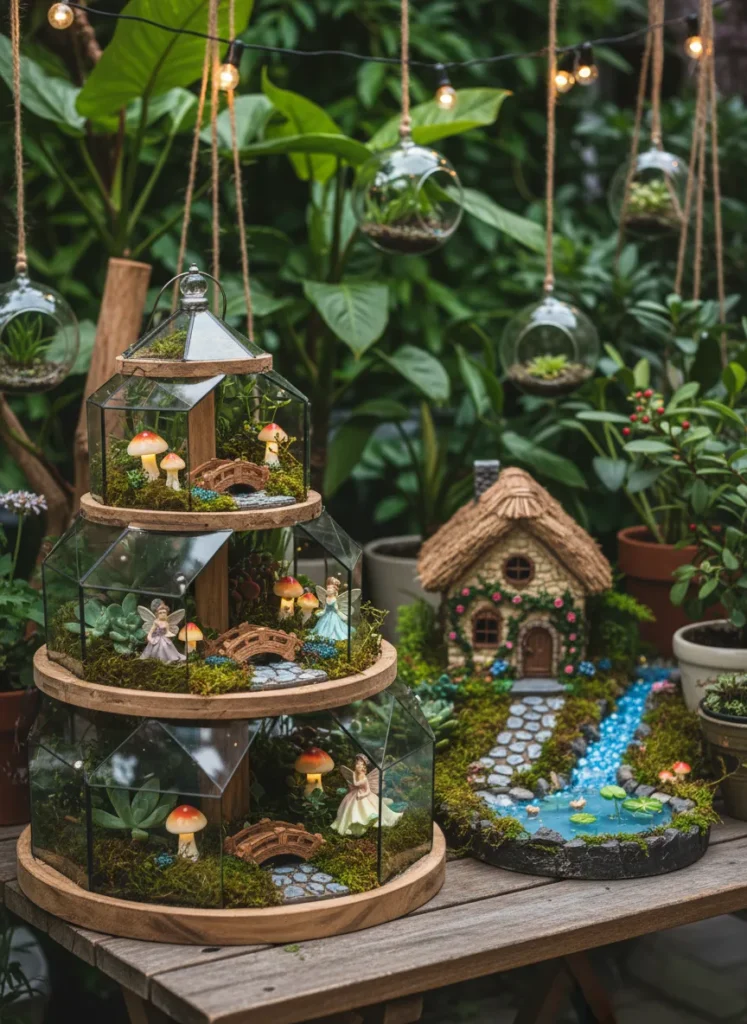
Fairy gardens are miniature landscaped scenes that bring a sense of enchantment and whimsy to any outdoor space. They can be created in containers, raised beds, tree stumps, or directly in the ground, and they invite endless creative expression through tiny handmade elements.
Build fairy cottages from clay, air-dry resin, or even stacked stones with twig roofs. Create miniature pathways from tiny pebbles or broken terracotta shards. Plant the garden with fine-textured ground covers like thyme, moss, baby’s tears, or miniature hostas to create a convincingly scaled landscape. Add tiny handmade furniture — chairs from cork and twigs, tables from mushroom-shaped clay forms, fences from lollipop sticks.
The magic of a DIY fairy garden is that it evolves continuously. Add new elements with each season — tiny lanterns in summer, miniature pumpkins in autumn, frosted pinecones in winter. Place your fairy garden where it will be discovered rather than immediately obvious, letting visitors delight in finding it tucked beneath a rose bush or nestled inside a hollow log. This creates a genuine sense of wonder and adds a memorable, storybook quality to your outdoor space.
Stained Glass Garden Panels
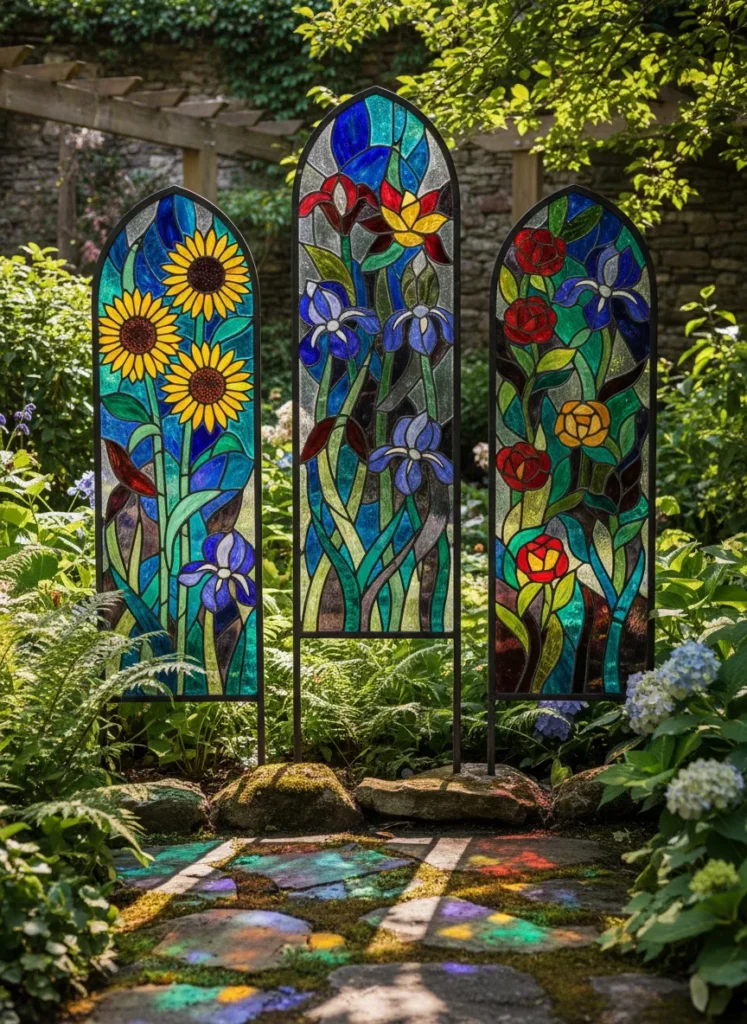
Stained glass panels bring cathedral-quality color and light to garden spaces in a way few other materials can match. Hung from arbors, fence posts, or pergola beams, they catch sunlight and cast pools of colored light across the garden floor and surrounding plants — an effect that changes throughout the day as the sun moves.
You do not need professional glasswork skills to create beautiful DIY stained glass garden art. Start with a simple design — a sunflower, a butterfly, a geometric pattern — and either use traditional lead came technique or the simpler copper foil method popularized for home crafters. Alternatively, use glass paint on clear plexiglass panels for a beginner-friendly version that achieves a similar visual effect.
For maximum garden impact, create a series of matching panels in coordinating colors and hang them at varying heights to create a layered, immersive color installation. As clouds pass overhead and light shifts throughout the day, the play of colored light through stained glass creates an ever-changing, living artwork that no static sculpture can replicate.
Repurposed Furniture as Garden Art
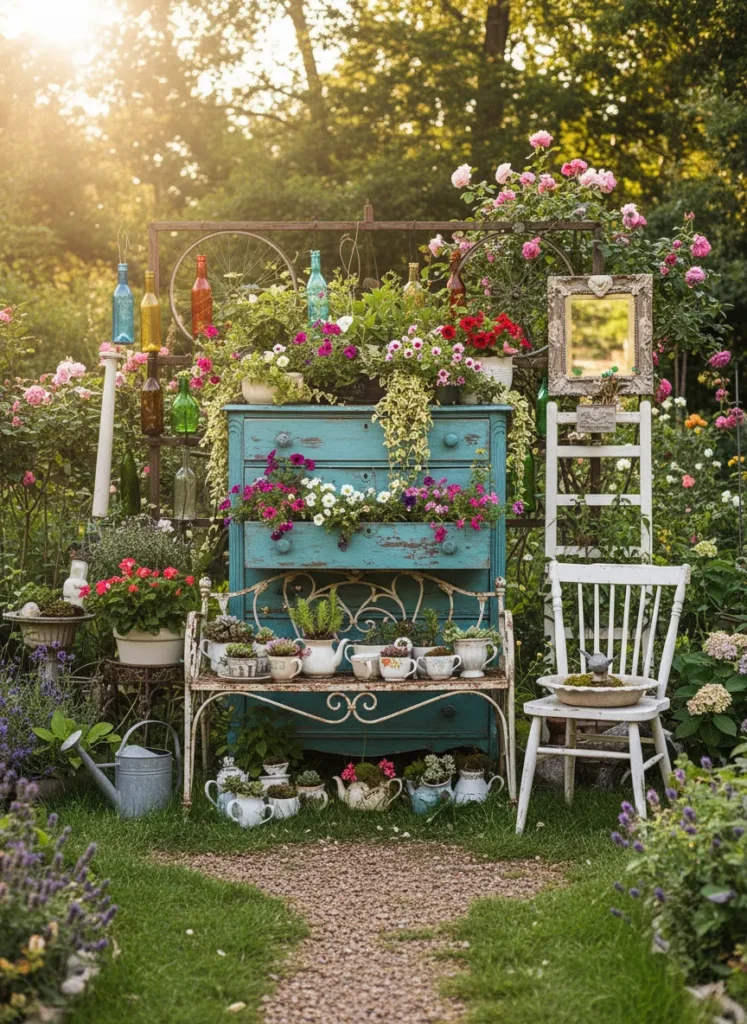
Old furniture pieces make unexpectedly wonderful garden art installations. A weathered wooden chair overflowing with trailing flowers, a vintage ladder used as a climbing plant support, an old cast-iron bathtub converted into a raised planter — repurposed furniture adds character and narrative to garden spaces in a way that new purchases rarely achieve.
Visit estate sales, thrift stores, and salvage yards to find pieces with interesting forms and aged surfaces. Treat wooden pieces with outdoor wood preservative before placing them in the garden, and line any planting areas with landscape fabric and drainage holes to protect the wood further. For metal pieces like iron bed frames used as trellises or old wheelbarrows used as planters, a coat of rust-resistant paint in a bold color will both protect the metal and add visual impact.
Repurposed furniture garden art works best when it blends authentically with the surrounding planting. A tattered armchair surrounded by billowing ornamental grasses and wildflowers looks intentional and artistic. A vintage bicycle leaning against a fence with baskets overflowing with petunias becomes a true garden centerpiece. The key is embracing the weathered, imperfect aesthetic rather than fighting it.
Handmade Clay Garden Totems
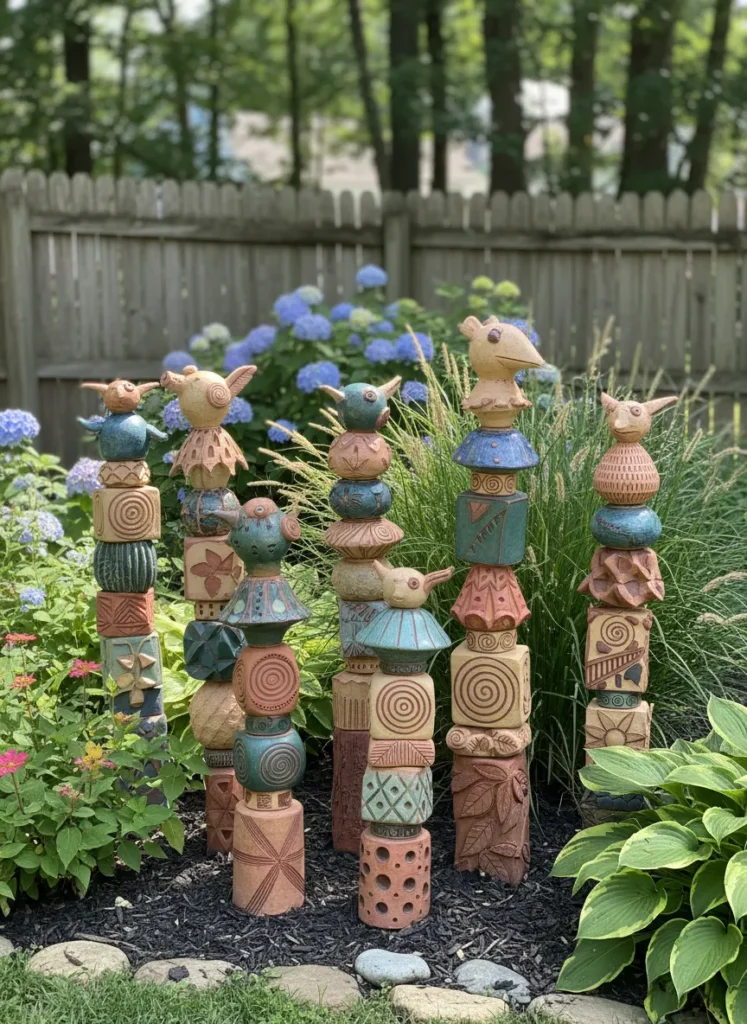
Garden totems are stacked sculptural columns assembled from various elements and mounted on a central rod. Clay versions are particularly beautiful because the material takes color and texture exceptionally well and can be molded into unlimited decorative forms.
To make a DIY clay garden totem, sculpt individual clay elements — orbs, faces, leaves, animals, geometric forms — using air-dry clay or outdoor polymer clay. Once dried and cured, paint each piece in bold, coordinating colors and seal with outdoor varnish. Thread them onto a length of copper pipe or rebar in a pleasing arrangement, separating pieces with glass beads or wooden spacers for visual rhythm.
Drive the central rod firmly into the ground in a prominent garden position. Tall totems work especially well as focal points at garden corners, along fence lines, or at the center of circular planting beds. Over time, as the paint weathers slightly and the clay develops a gentle patina, they take on an even more organic, artisan quality that mass-produced garden ornaments can never replicate.
Upcycled Metal Watering Can Sculptures
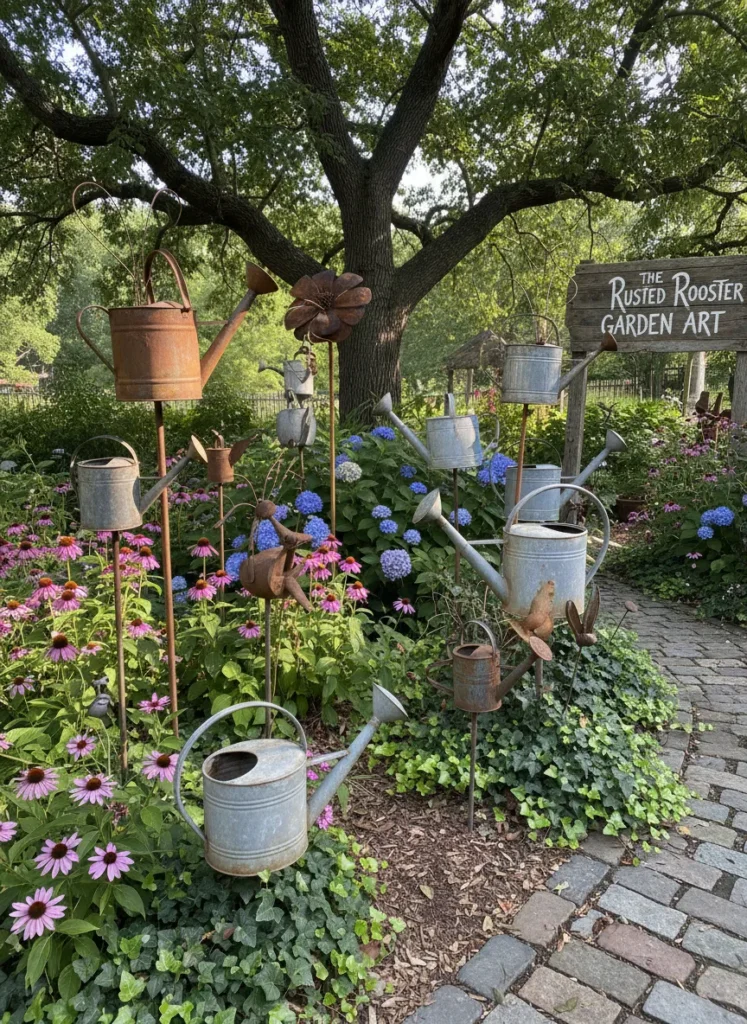
Old metal watering cans have a classic garden aesthetic that makes them perfect candidates for DIY garden sculpture. Vintage or thrifted watering cans can be transformed into stunning yard art through paint, rust treatments, and creative placement.
One of the most popular techniques is the “pouring” watering can illusion — mount a watering can on a stake at a slight downward angle, then arrange a stream of blue glass pebbles, mirror tiles, or even growing ground cover plants beneath it to simulate water pouring from the spout. The effect is charming, witty, and immediately eye-catching. Paint the can in a contrasting color to the garden backdrop for maximum visual impact — bright red against green foliage, cobalt blue against golden grasses, sunshine yellow against dark mulch.
For a more painterly approach, treat your watering can as a miniature canvas. Paint elaborate floral scenes, landscapes, or folk art patterns across the surface using outdoor acrylic paint, then hang it on a garden fence or gate as a decorative wall piece. Collections of watering cans in graduating sizes and coordinating colors make a charming and cohesive installation.
Solar Light Garden Sculptures
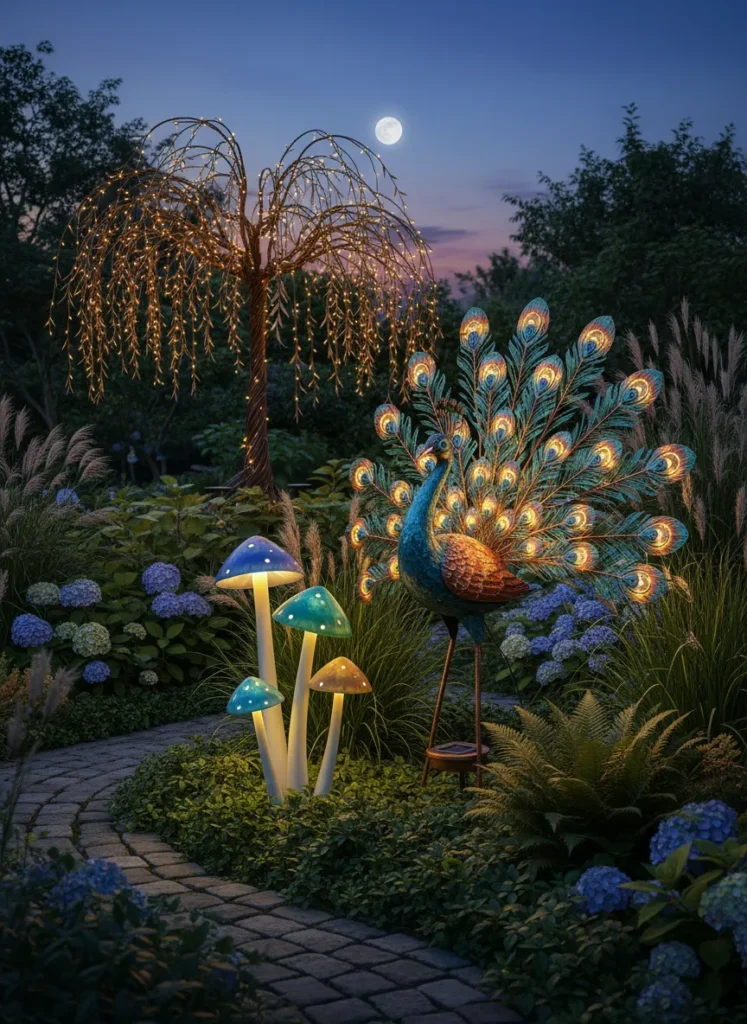
Solar-powered garden art solves one of the biggest challenges in yard decoration — keeping the garden beautiful after dark. DIY solar light sculptures combine daytime visual appeal with nighttime illumination, creating garden features that look stunning around the clock.
To make your own, incorporate solar fairy lights into existing garden sculptures — wrap them around wire topiaries, thread them through bottle tree branches, wind them inside glass jar lanterns hung from shepherds hooks. For a dedicated solar sculpture, create a framework from copper wire or rebar in any desired shape — a large star, a tree silhouette, a butterfly — and wrap it entirely in solar LED fairy string lights.
Another highly effective approach is the solar jar garden lantern cluster — fill a variety of glass jars with colored glass beads and a small solar fairy light coil in each one. Arrange them in clusters along garden paths, on garden walls, or hanging from tree branches. By day they are colorful glass installations; by night they glow warmly from within, creating an intimate, magical garden atmosphere. This project costs very little but creates an effect that looks truly luxurious.
